Miniature Ordnance Review looks at the world of historical and fantasy miniatures wargaming and model building. From 15mm Flames of War, to Warhammer 40K, to 1/35th scale tanks, with some potential surprises on the horizon - you'll find them here!

Sunday, March 1, 2015

510 Schwere Panzer-Abteilung Photos!!!

While I continue to paint away on my Black Brigade force (which is still not done, unfortunately, but now that the pressure is off I'm not spending as many hours a day on it either!), I wanted to take a brief moment to go back and get some good photographs of the army I took to Tanksgiving this year, my 510. Schwere Panzer-Abteilung. This was the second army I'd tried to do a full modulated paint job on, and I think it came out pretty well. The core of this unit is the RT Tiger II tanks, a total of five of the beasts. I actually managed to get the pictures to come out pretty well, they're not perfect, but I was able to take advantage of natural light and get some decent shots.

As 510. Schwere Panzer-Abteilung as depicted in the Remagen book is a very late war force, it ended up with a mixture of paint jobs on its vehicles, and according to Trojca's reference, with no distinguishing markings (crosses or turret numbers) and very little stowage. I decided to make the "ambush" scheme Tiger II's the command squad (though data shows that the commander may have actually used the red primer tank), with the CiC in the tank with the open hatch


Below are a couple of rear 3/4 views of the HQ tanks. Unfortunately some of the washes and fine detail are lost in the light, but you can pick out some of it


For the first platoon consisting of two more Tiger II tanks, I went with the "octopus" scheme, as the unit apparently had at least one in this scheme.


Again, I was fairly pleased how these came out. As with the CiC, the platoon commander is the vehicle with the open commander's hatch.  Below is another photo from the other side.


I really like how this scheme came out, and I may have to work up some more Tiger II's using this scheme (which is admittedly rare, so I'll have to choose wisely).

The final Tiger II of the unit is a fairly odd bird. It is primarily in primer red, with some panzer dark yellow over-spray. The vehicle was commanded by an Oberleutnant Helpup. Though I couldn't get a good picture to come out, this vehicle has two track guards in the rear that are in ambush scheme.


The nice thing about the RT Tiger II list is you have enough points to buy enough Tiger II tanks to make a difference, and still buy some reasonable support as well. With Two Tiger II's in the command squad, and another two in one platoon, I can get four of my five on the table only using up one platoon in a reserves mission. However, the Tiger II is vulnerable to the sides and rear, so protecting the beast is a must.

My primary infantry support for the list was a unit of Westfalen infantry. These guys get "enjoy the war" with a 2+ save, so they're likely to stay around when you need them to. They took a while to paint because of the Erbsenmuster camouflage, but the end result was worth it.  I've included two photos below of the whole unit as the focus shifts between them.


As you can see from the photo above, the only drawback to the unit is its relatively small size. While that's a bit of a handicap on the tabletop, it was helpful in terms of actually getting them painted in time! The photos below give you an idea how many colors these guys have on their uniforms!


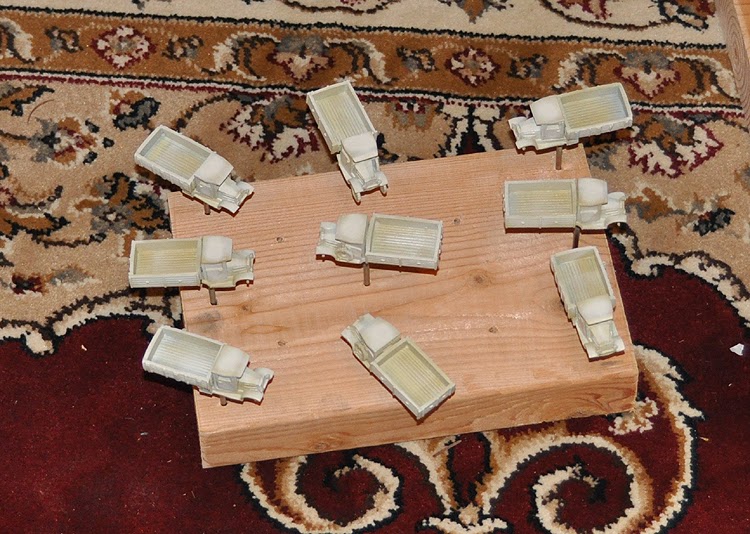
While the Westfalen infantry is a good support choice, I wasn't done with the unit as I picked up a group of Westfalen training tanks as well. These are a great reserve choice as they can come in and disrupt your opponent's attack. I went with a "well worn" look on these with a mix of Panzer III and one Panzer IV. They served as a nice contrast to the cleaner lines of the freshly produced Tiger II tanks.


One of the banes of any heavy tank army is ground attack aircraft (and artillery being directed by an AOP). So I made sure I took a reasonable anti-aircraft unit to not only serve in its traditional role, but serve a useful anti-infantry, and even in some cases anti-tank role. The Luftwaffe Flakvierling unit was painted to look a bit battle-worn. I've weathered the paint jobs on the guns themselves a bit with several chips, and the crews have a mix of helmet types.


Finally, to provide a little bit of artillery and smoke support, I included a unit of three Nebelwerfers. These are an inexpensive, but useful choice that has a couple of very important roles in the game - probably the most important being to lay smoke on the enemy advance.


So there you have it. A late war army that really captures the feel of the last desperate days of the war. Green crews in freshly painted super-tanks, supported by a mix of replacement and training units from not only the Heer, but from the SS and Luftwaffe as well. The army was also a real blast to play. I look forward to using the two Westfalen units as a core to build that army as well.

Monday, February 16, 2015

The Polish Painting Weekend

I've spent most of the long weekend painting up my Polish Black Brigade vehicles. I decided to use a mixture of AK interactive paints to get the modulation effect I like, though I had a tough time of it with the very small vehicles. As there are no modulation colors out there for Poland, I've decided to use the AK Interactive Dunkelgelb, Panzer Red Brown, Soviet Green, and a filter to get something that looks respectable for the Polish Three Tone Scheme.

I started with a dark yellow base as I was planning to go lighter than normal with the Polish yellow. In retrospect I might should have gone a bit darker for the initial coat, but the end effect I think will still be pretty good once the whole thing is done.


I then ran a modulation coat over it - you can see the modulation, but its a bit light:


From the photos above you can see that the biggest challenge with this army is the sheer volume - lots of vehicles and lots of guns. My next step was to pull out the Panzer Putty and begin masking. That process also took quite a while (unfortunately which seems to be the running theme of the army).


The shots above show the red-brown after modulation.  Again, I'm thinking I should have started a bit darker and worked up from there. Once again I was back to the Panzer Putty:


For the green, I decided to start dark, and I do mean dark! I worked it up from there with two highlight steps. I had to do the wheels separately as there were a lot of them... a whole lot of them...


However, once everything was painted, the base coats came out pretty well. I think they'll take the filter and washes well, and only need a little highlighting here and there to pick out a few key details.

First the guns and carts - even the gun shields for the 75mm and 37mm guns are modulated - along with the tracks for the TKS:


Next the vehicles - you can see the green modulation is much stronger than the other two colors. I think the filters and washes should blend things out and pick out the details nicely


The final big question is will all this be ready in time for the tournament this Saturday? I'm starting to think that it likely won't be, and now it's too late to go with an alternate. So I'm going to have to double down and try to get it done. I have Thursday and Friday off, so I may have to dig really deeply and burn that midnight oil!

Wednesday, February 11, 2015

Pz Inz 302 and Polski-FIAT 518 Mock Ups

The last of the vehicles are finally coming together. I've completed the casts for the Pz. Inz. 302 tow vehicles and the Polski FIAT 518 trucks. At this point they aren't primed and the wheels aren't attached, but I wanted to get a feel for how the final vehicles were shaping up.


Above is the Pz. Inz. 302 tow vehicle for my 37mm anti-tank guns. The spare wheels are molded in meaning I just had to test fit the rear wheel and the front wheels. So far the clearances look fine - I may need to cast up more of the rear wheels, though. I've also added a copper wire bumper to the front that I'll do for all vehicles of this type. 


The Polski-Fiat 518 trucks are also looking pretty good. I may need to adjust where the spare tire sits just a bit, but the HO scale wood works well for the rails. I'm using copper wire for the mounts as it is durable. At this point I'm pretty happy with this vehicle as well. Once the bumpers are on, then I'm off and running with the painting.

As to the painting, I'm going to try a modulated paint job on these, which means I'm going to be using a mixture of German and Soviet colors from AK and Ammo of MIG. Since the colors are a little off of what the Poles used, I'm going to be using some of the new Ammo of MIG filters to get the colors as close as possible.


Monday, February 9, 2015

Another Casting Weeked - The Polish WZ-34 Halftrack

With now less than two weeks to my target tournament, it's time to move from the construction phase to the full painting phase. Technical that time was really a couple of weeks ago, but I've run into several snags along the way that have slowed my progress. The biggest setback was when the miniatures I'd hoped would serve as my halftracks came in and they were too small. Since then I've been trying to rework miniatures so I can start painting soon.

A little over a week ago I gave you a sneak peek of the modified Polski-FIAT 621 truck which would serve as the basis for the WZ-34 halftrack (as the two vehicles are quite similar). As expected, the surgery on the truck cab itself was the easy part. The real difficulty in building any tracked vehicle is the caterpillar suspension and track. I decided to make one copy of the key running gear components and cast them so at least the individual components would match well.  I then assembled a separate left and right track assembly from the cast parts.


I attached the components to a thin styrene backing sheet and created some block tracks. I then thinned the right and left edge of the tracks as from what I can tell the WZ-34 had tracks similar to the German tracks with a raised rubber pad. I may re-work the tracks later if better evidence comes to light as that would be the easiest part to rework. As you can see from the photo above, the track assemblies are fairly intricate.

The next step was to cast up several copies of the track unit. I decided to cast them with a sprue from the back as the assemblies would have to bear the weight of the miniature, and a thin open resin piece would be likely to simply crack or shatter. If anyone has access to a good metal spin caster I'd be open to trying to cast an open version. I was ultimately able to get several cast up, though there are some imperfections in a few of them.


This past weekend was pretty much dedicated to casting and writing... something that I can't talk about yet (watch this space). I managed to get a new belt in for my band saw, so I was able to save myself a lot of time removing sprues as even with my dull blade, it makes short work of the resin (remember your dust mask!). Part of the pile is below, including many copies of the Pz. Inz. 302 tow vehicles for my 37mm anti-tank guns.


Given the bed of the truck was also a bit different, I also had to cast up several copies of a modified bed. I changed the sides, but left the front and rear pretty much unchanged. You can see a few of the boxes in the photo above, along with cast front wheels and a few of the halftracks.

I normally paint suspension components before attaching them to the miniature, but in order to set the connection points for the tracks, I needed to assemble a mock-up of the completed kit. I used a short section of styrene rod as a front axle and some styrene shims to attach the track assemblies to, and the completed miniature actually looks pretty good.


At this point I've completed most of the assembly on the five WZ-34 halftracks I'm going to need, and I've started working up the Pz. Inz 302 trucks. I'm also adding the final details to the Polski-FIAT 518 trucks and should actually have everything primed this week. If all goes well I'll start the marathon painting session on Saturday and hope to have all of the vehicles painted by the end of the weekend.


Tuesday, February 3, 2015

Of Polish Tow Vehicles - the Pz Inz 302

Don't you just hate it when you're most of the way through a project and you realize that you've done something catastrophically wrong. Well, in this case not "catastrophically" wrong, but certainly dang inconvenient. The Polski-Fiat 518 trucks I've been working on are perfectly fine for many of the ones I need for the force. I've even managed to get a new mold working for the 518, and then as I was researching I discovered an issue - it doesn't look like the 518 truck was used to tow the 37mm anti-tank guns. That honor went to the Pz Inz 302.

So what is a Pz Inz 302 you ask? Fortunately it's pretty much an open topped version of the 518 truck with a rear facing rear seat and large bin on the back. So I took one of the resin 518 trucks and began major surgery. The Pz Inz 302 has no doors, so the seats are exposed. I ended up borrowing some from the True North staff car. The rear seat has no stitching, so I just used the shape of the back seat for reference.


Rather than waiting until after the miniature is cast to add the spare tires, I'm going ahead and integrating them into the miniature itself this time around. I'm still trying to decide how I'm going to integrate the windshield as I really don't want to have to cast a second piece.


Apart from a few details, this one is just about done at this point, and I'm hoping to work up a mold for it later this week when my new batch of RTV makes it in. I've found the Alumilite High Strength 3 works well for me as I tend to run a lot of masters with severe undercuts.


Unfortunately this little revelation has put me a few more days behind where I need to be. Way too much of the army is still in primer, and I'm only a little more than two weeks out at this point. That being said, the troops with green uniforms are through the base coat, shade and highlight phases on the uniform. At some point I'm going to need to get back to those All Quiet on the Martian Front miniatures too, though I like the effect of the Martian tripods looming over my Black Brigade.

Sunday, February 1, 2015

Polish Black Brigade - the Churn Continues!

I've been making some progress on the Black Brigade, but it's sort of been in the "two steps forward, one step back" mode at this point. I had been making good progress on the casts of the 518 truck variant, but my mold finally tore apart after five good castings (well, actually six good castings, one of the castings I goofed up all on my own!).


However, as you can see from the photo above, the ones that did come out look pretty nice. Once I get the sprue removed from all of them they're just about ready to paint up.

Given the scale disaster that was the Quality Miniatures halftracks, I've decided to try and see if I can get some to cast. I don't know if it will work, and I'm still working on the tracked suspension itself. I've made the modifications to a 621 truck cab (shown below ready for casting):


On the driver's side, the main addition is the spare tire and brackets. I've also removed the bins that were just behind the running board and added a small fender there.


On the passenger's side, I modified the door to match the rounded pattern seen on the driver's side as sometimes a spare tire was bracketed on this side as well. I may add a few tires to create some differentiation.

I have several new molds hardening at this point - including a new mold for the 518 truck, and some of the track details for the halftrack. I'm hoping to get the tracks together for the halftrack in the next day or so (if it actually turns out to be possible) and start the casting... but with a tight deadline coming up for the tournament, I'm beginning to wonder if it is all going to get done or not.

Tuesday, January 27, 2015

Of Halftracks and Polish Trucks - Good News and Bad News

My order of the Quality Castings C4P halftracks finally arrived, and unfortunately I think I've got a major problem at this point. Don't get me wrong, the Quality Castings models are quite lovely. The detail is crisp. The construction is finer than the True North versions. Unfortunately they're laughably out of scale with the True North (and Battlefront) figures and vehicles.


From the picture above you can see one of the True North figures and their version of the Polski-Fiat 621 truck. There are a few minor issues with the truck - the wheels are a bit big, but vehicle scales well compared to the human miniatures. To the far right you can see some of the components of the Quality Casting C4P cargo halftrack. The real thing has essentially the same frame, bed, and superstructure as the truck, but the size difference between the two is staggering.

So who is right and who is wrong? Proportionally the True North truck is fairly close. The bed may be a touch big, but only a touch. The True North staff car also scaled well when I reworked plans based on a 1/35th scale model kit to make the 518 truck. That leads me to believe that the Quality Casting versions are on the small side, and not by a little bit. The difference is more than even what I'd expect from a 15mm vs. true 1/100th scale as well.

Bottom line is this leaves me with a conundrum. The True North trucks won't work with the Quality Casting halftracks or staff cars. The Quality Casting staff cars have the same wheel detail issues as the True North ones (which I've already created a "fix" for and began casting). My scratch-built 518 truck is in scale with the True North staff car. Do I try to get some Quality Casting trucks and deal with a slight difference in scale for the trucks and halftracks (with everything else), or do I try to convert the 621 truck to a halftrack (which would mean making my own suspension and tracks)? I'm not sure I have time left for either option. A third option would be to drop the halftracks entirely which would sort of spoil some of the tactics I'd planned on using for the list.

So that's the bad news, but the good news is actually pretty good. I've finally managed to sort out the difficulty I've been having with my resin and RTV. The Alumilite high strength RTV I was using was past its useful shelf life. It seems the catalyst especially degrades over time, which would explain why my RTV refused to cure. I bought some new, along with some Alumilite slow setting resin and the difference has been staggering.


The photo above shows my first test cast of the 518 truck. I'm going to go back over the miniature to make sure I don't have any glaring errors, but overall, I'm pleased. The final miniature will need a couple of additions which I haven't figured out how to cast yet, but the primary additions are a couple of rails suspended above the rear quarter panels, which won't be hard to do. Now that this miniature is coming out, I should be able to make a 508 truck and a few others as well.