I am a huge fan of Battlefront Miniatures and Flames of War. It's a game that lets me get my model building fix, miniature painting fix, and wargaming fix all in one. Throw in the fact that they let me actually write, proofread and playtest for them, and you've got a winning combination. Generally Battlefront's miniatures are some of the most accurate and highest quality you can get in 15mm scale, which is the main reason why their Panzer IV Ausf J (GBX68) is so disappointing. I picked up a box a while back planning on using the Ausf J for several Very Late War armies. With the release of Desperate Measures covering the Soviet Vistula-Oder offensive, I was finally ready to pull the trigger on these little beauties.
I'd always had a love/hate relationship with Battlefront's metal Panzer IV tracks. Overall they look great when painted up, but they frequently require quite a bit of clean up, especially on the top of the fender. I was looking forward to the new Panzer IV's because they came with the updated plastic tracks. As with the earlier Panther tracks, you sacrifice a bit of track detail, but the wheel detail and fenders promised to be excellent.
I got the first five together, and as expected, the assembly was much easier and there was a lot of really fine detail on the tracks and fenders that was frequently lost or not present on their metal equivalents. However, as I built them I had a nagging feeling that there was just something not quite "right" about them...
While letting some of the last details on the Ausf J's dry, I decided to pull out a couple of Ostwind to provide some much needed air support for my poor Germans (and to maybe keep those pesky AOPs out of the way). The Ostwind includes the older metal tracks with the reversible first two roadwheel positions (so you can run steel wheeled or regular rubber tired wheels). I looked at the tracks, and the metal version of the running gear looked "right." So I tried to figure out the difference between the two...
Then it hit me. The idler (the wheel at the back) on the plastic tracks is wrong. It is supposed to have seven spokes, and it has eight. The asymmetry of the idler is one of the characteristic features of this design, and Battlefront had botched it on the plastic tracks. Unfortunately it is likely to be a very costly fix as the problem is in the injection mold itself. As Battlefront has announced an all plastic Panzer IV Ausf H in the coming year, I hope they double check the molds for it.
So where does that leave me? I'm a chronic rivet counter, and having the wrong wheels on an iconic tank like the final Panzer IV just doesn't sit well. So I've developed a work around until Battlefront gets the mold fixed (IF they ever get the mold fixed). First you have to remove the offending idler:
I have a dremel bit that is roughly the same size as the idler, so it's fairly easy to set the stylus tool for low speed, carve out the idler, and then hit the area with some liquid cement to smooth out the burrs. I've cast up a bunch of idler wheels from the metal version that I use as replacements:
I left a little extra material on the "as cast" idlers so I can custom fit each one to the tracks. Once the dry fitting is complete you simply pop in the replacement idler and you've got a corrected Panzer IV Ausf J:
As Battlefront has designed their plastic parts to be drop in replacements for the white metal, the fit is excellent.
Unfortunately this is a major screw-up for Battlefront. Now that I have a reasonable work-around, I'll still buy some of the Panzer IV Ausf J's to round out the various armies, but a quick fix from the company (that doesn't involve going back to metal tracks) would be very welcome.
Miniature Ordnance Review looks at the world of historical and fantasy miniatures wargaming and model building. From 15mm Flames of War, to Warhammer 40K, to 1/35th scale tanks, with some potential surprises on the horizon - you'll find them here!
Sunday, January 5, 2014
Wednesday, October 9, 2013
39(H) OP Ready to Go!
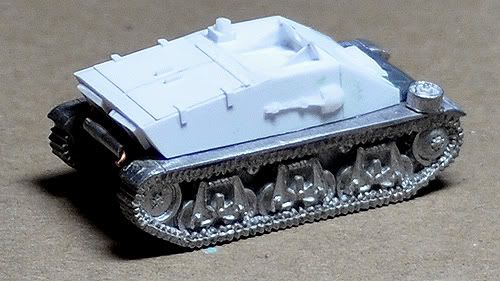
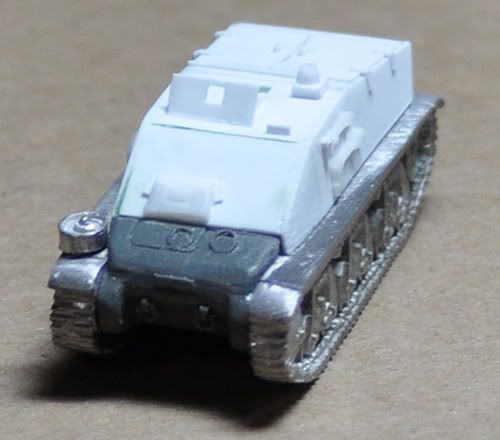
Finally got my commission 39(H) OP cast up and ready to go... to "some guy" down in New Zealand. Pretty happy with how it came out. May need some final clean up before painting, but overall I'm pleased with the result.
Here's a couple of photos:
Amazing what a good camera sees that your eye doesn't. I've since cleaned up the shovel some.
I went ahead and added the jack in styrene. Now it just needs the machine gun and commander and it will be ready to go.
I wasn't able to vacuum cast these for some reason. I think the resin was getting a little old and was outgassing a lot more than normal. Mold could still have been outgassing some as well. I'm going to try and make up one more for personal use so I don't have to burn the master.
Lots of "stuff" going on this week so I'll hopefully have more to post later on!
Here's a couple of photos:
Amazing what a good camera sees that your eye doesn't. I've since cleaned up the shovel some.
I went ahead and added the jack in styrene. Now it just needs the machine gun and commander and it will be ready to go.
I wasn't able to vacuum cast these for some reason. I think the resin was getting a little old and was outgassing a lot more than normal. Mold could still have been outgassing some as well. I'm going to try and make up one more for personal use so I don't have to burn the master.
Lots of "stuff" going on this week so I'll hopefully have more to post later on!
Tuesday, September 17, 2013
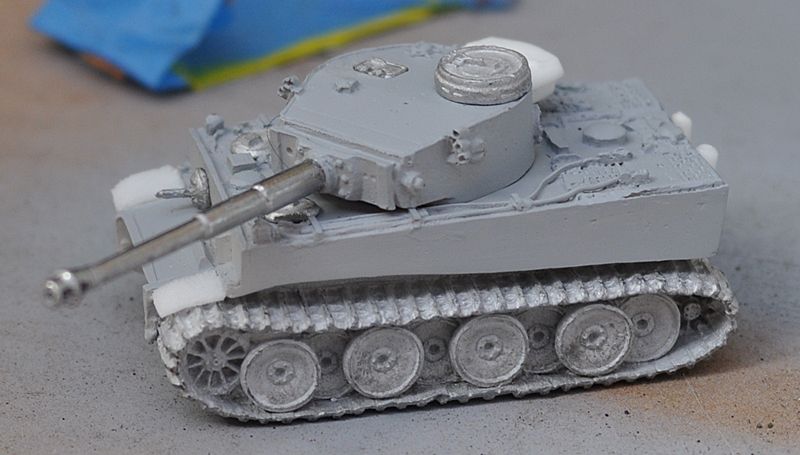
502 Schwere Panzerabteilung - Early Tiger I Progress
In addition to the initial production Tiger I tanks
fielded by 502. Schwere Panzerabteilung, there were also a few of the more
standard early production vehicles. The
Battlefront miniature represents this type well, and fixing them for the
specific vehicles of this unit is generally easier. Well, sort of.
Placing the individual rivet decals was a bit
challenging, but it went fairly quickly using the normal techniques you'd use
for high-quality decals. I did use a
little diluted Solvaset to make the film snug down properly.
The first change was the removal of the shovel from the
front top hull. The other change is the
unit's tanks lacked the characteristic side-skirts seen with the Tiger I. The challenge for me was to find an easy way
to replicate the hanging studs for the side-skirts (which were present - unlike
on the initial Tiger I).
Ultimately I found a source that worked flawlessly. Archer Fine Transfers has a line of surface details. These
surface details are resin on very thin, high-quality decal film. Their catalog can be downloaded and has true
size scans of the various details. I
found a set of rivets that looked to have the right spacing for the studs -
granted they're round, not square, but at this scale it is going to be hard to
tell the difference.
I drew lines with a straightedge to guide placement of
the decal rivets. I ended up using set AR88083
which seemed to have the right spacing for the side skirts.
I cut out the rivets in groups of four cutting the decal
with a very sharp hobby knife near the top and bottom of the rivets. I also didn't leave much space at the ends.
Before priming the studs looked a bit large, but after a
prime coat they look pretty good. The
beauty of the Archer system is it is literally designed to be primed and
painted over.
I'm sure they scale out a bit large, but even up close
they have the distinctive 4 sets of 4 studs look of the actual Tiger I. They should paint up and weather nicely. I'm still hoping to field this army in late
October, and have a LOT of work yet to do... as always!
Saturday, September 7, 2013
Tournament Organizer
One of the biggest challenges at any gaming tournament is
quickly and easily moving your army from game to game. If you pack everything back into the carrying
case, you frequently lose precious gaming time because you have to get it back
out again, for me frequently in multiple levels of a battle foam box.
Had to add the gag about "allow for expansion" because who really has enough FoW miniatures? Really?
So far I think he's only done one batch of these, but if he ever does another batch I strongly recommend any tourney player think about picking one up - or building something similar themselves.
Chris Fretts came up with a really nice tournament box
option for flames of war. The top of the
box has ample room for your army and even some ground work to show off your
nicely painted army when the painting judges come by. The box includes a drawer and a couple of
slots that can hold you small rulebook, army lists, PDF's, dice, templates, and
markers.
I decided to do mine in a generic U.S. Army paint scheme
of Olive Drab with a few stencils. I've
been experimenting with various sprays and stencils and this gave me another
chance to try out a few techniques (pictures below). I'll likely end up hitting it with a final
protective coat as well.
Had to add the gag about "allow for expansion" because who really has enough FoW miniatures? Really?
So far I think he's only done one batch of these, but if he ever does another batch I strongly recommend any tourney player think about picking one up - or building something similar themselves.
Tuesday, September 3, 2013
Mystery Project Update!
So here's some more photos of the first of the two
mystery projects... At this point people
should be pretty close to getting it.
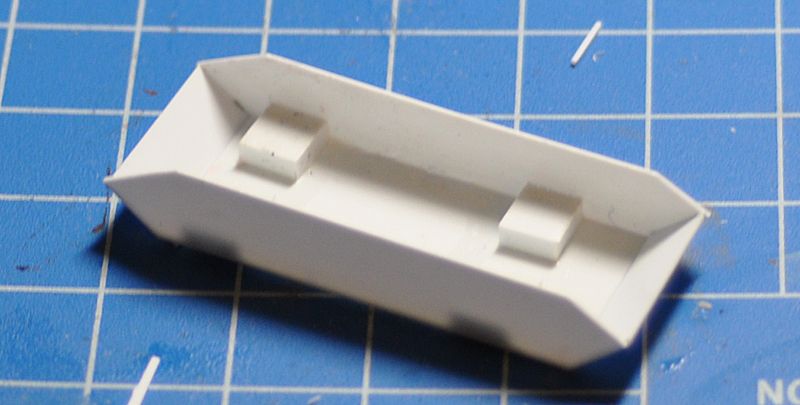
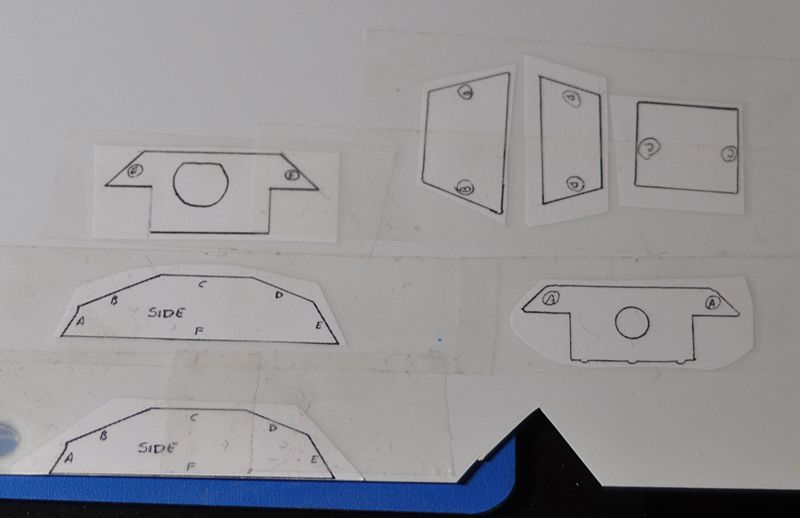
The basic hull is together, but I still need to do some
clean up - I'll get it posted later this week... :D
Building the 39(H) OP
A while back I built a 39(H) OP vehicle for the 21.
Panzer Division Beutestug list for a friend.
I was building one for myself at the same time, but other projects ended
up taking priority and I never ended up finishing it. I received several requests for additional
ones, but didn't have the time to hand build each one, but I may have found a
way to make it work.
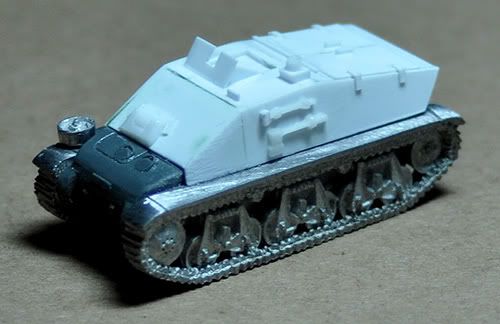
Here's the original I built a while back:
I'll be posting some pictures of the "new and
improved version" - along with hopefully a cast - later this week.
Monday, September 2, 2013
502 Schwere Panzer Abteilung Update
I'm finally making progress on my 502. Schwere Panzerabteilung army... since I have a MW tournament
coming up in October. The point value is
a bit different than I've run in the past at 1675, but I'm going to go with
it. I'm modeling the unit in early 1943
before the organizational changes characteristic of that year take effect. As such I'm going with a purely winter themed
army.
Combat 2: Tiger I E (385 points)
Total = exactly 1675 points
The list I'm going with is here:
HQ: Command Tiger I E + Sd Kfz 9 (400 points)
Combat 1: Tiger I E, Panzer III N (495 points)Combat 2: Tiger I E (385 points)
Support:
Grenadier Platoon = Command Panzerknacker SMG team, 8X
Rifle/MG Teams (205 points)
Rocket Launcher Battery = Command SMG Team with field
car; AT section with 3.7cm PaK36 with Stielgranate, 4X 15cm NW41 launchers with
4X Sd Kfz 11 half-tracks. (190 points)
Yes - I know it isn't great, but any time you take a
Tiger list you're dropping nearly 1200 points in your compulsory choices before
you get to add the gravy. Given the list
lacks recon I figured I'd just go with some smoke and some decent infantry to
cover the tanks.
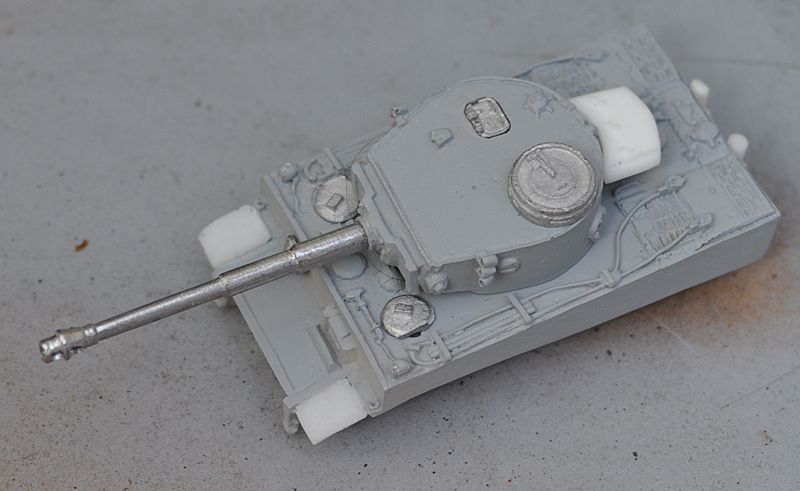
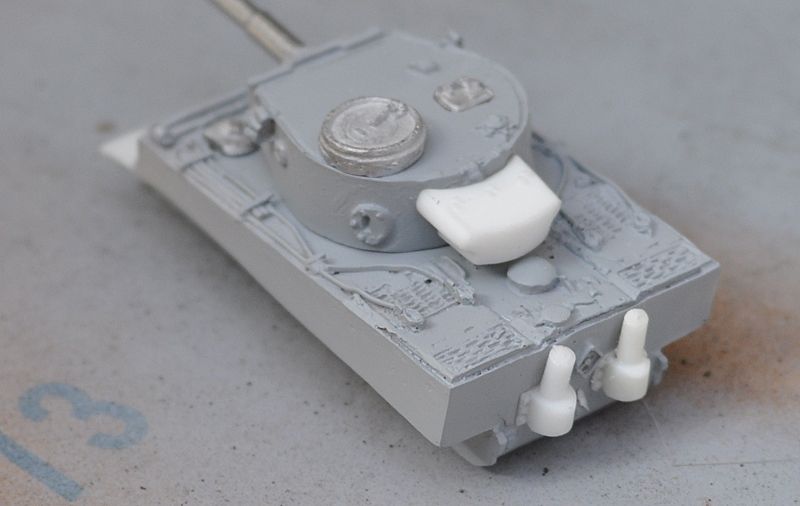
Here's a couple of pictures of the first Tiger I going
for its final priming:
The initial Tiger I's used by the unit didn't even have
the hangers for the side skirts. I'll
have a total of two initial production and one of the early production variants
(which also requires a little work).
I'll post photos of the early Tiger I later this week once I get some of
the detailing supplies I need to finish it up.
Subscribe to:
Posts (Atom)