Miniature Ordnance Review looks at the world of historical and fantasy miniatures wargaming and model building. From 15mm Flames of War, to Warhammer 40K, to 1/35th scale tanks, with some potential surprises on the horizon - you'll find them here!

Wednesday, December 30, 2015

Thoughts on What's Next for Flames of War

Last year John-Paul made us wait until March for the "state of the union" address as to what was coming next for Flames of War - this year we get the update on New Year's Eve (New Zealand time - a day earlier for many of us!). All I can say is that I'm very excited for what I'm seeing!

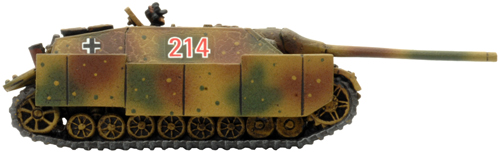
First up is the V3 update for Mid War. The update of North Africa and Eastern Front was supposed to happen earlier this year, but as JP says, "it has taken the game designers longer than we anticipated..." Given the volume of changes in V3 and Lessons From the Front it's not entirely surprising that something had to give and these were pushed out. This is a digital only update, but I'll be going ahead and picking up the new versions of the books as I still enjoy MW quite a bit and have a new MW army I'm working on...

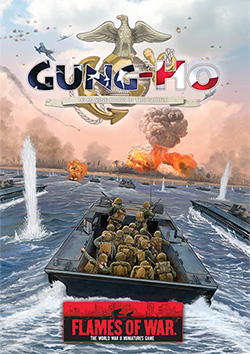
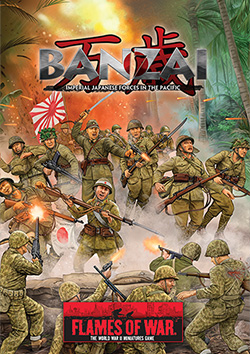
Given that Team Yankee was pushed out to the end of the year, it's not surprising that the original December and January release dates for Flames of War Pacific also slipped. At this point we're being promised a release in the March time frame. The American book covers the U.S. Marines in the Pacific and is called Gung Ho, while the Japanese book is called Banzai. No official word on what lists are covered in each book at this point, but I'll have more information once the books are officially released into the wild. Again, this is a part of the war I've wanted to model for a VERY long time - especially the fun (though fragile) Japanese tanks.


With the release of the Berlin book, I'd thought we were pretty much done with World War II in Europe, but the a few weeks ago JP indicated that there would be a Battle of the Bulge compilation. We now have a little more detail on that project, which will combine the three Bulge books, Blood, Guts and Glory, Nuts, and Devil's Charge, into a two volume set with some additional material added. Unfortunately there's no detail on the additional material at this time.

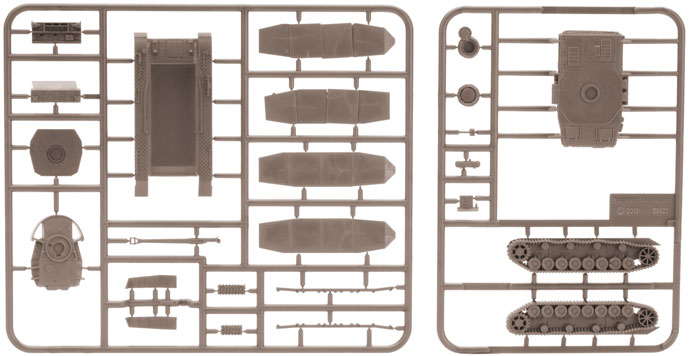
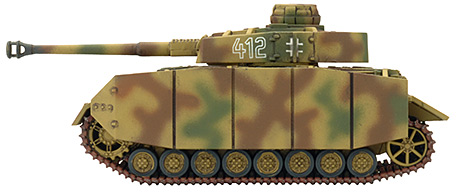
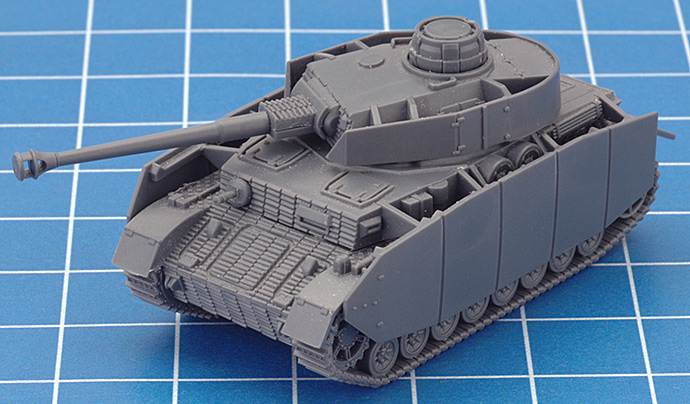
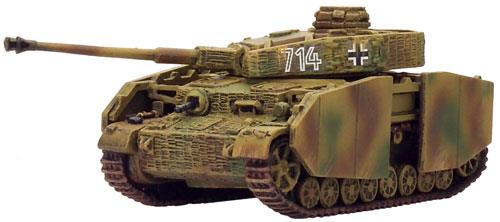
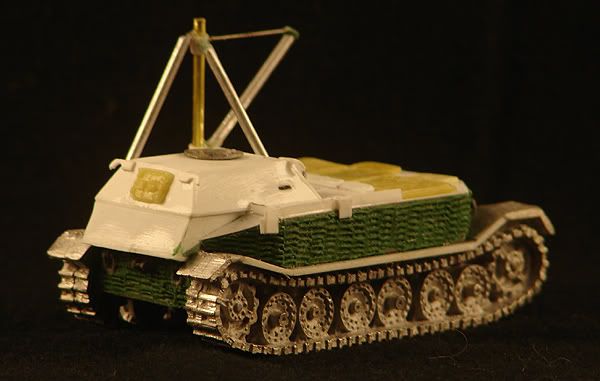
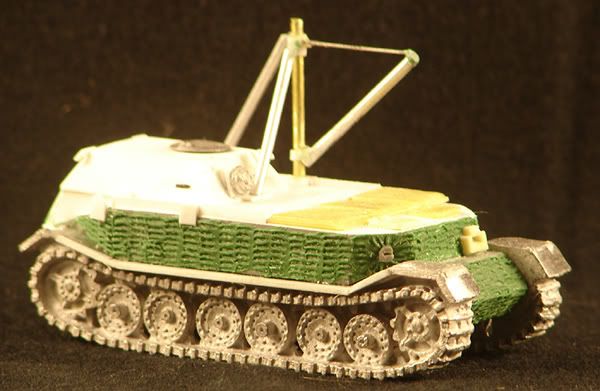
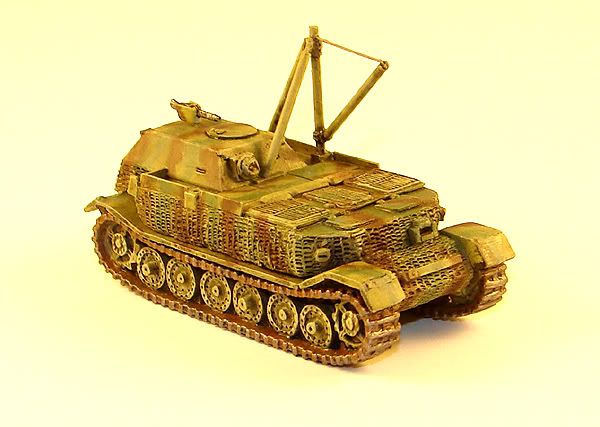
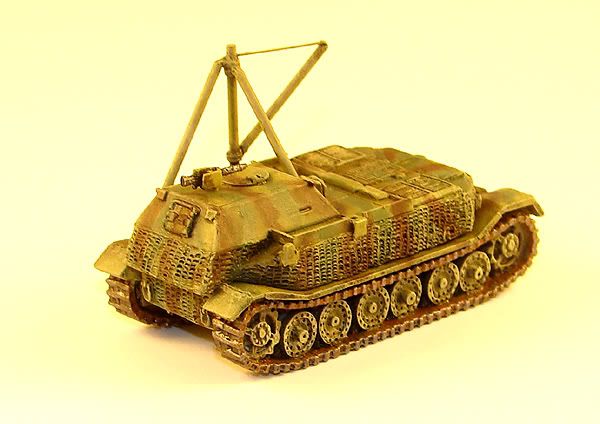
JP also indicates that there will be "a brand new book release" for Late War, and that this release will be accompanied by new plastic models. I honestly have no clue as to what this will cover, but I can think of a few operations that haven't been covered yet by lists. The "new plastic models" bit intrigues me as well. Maybe an updated (read corrected) all plastic Panzer IV Ausf J? I know I'd scoop those up in quantity...

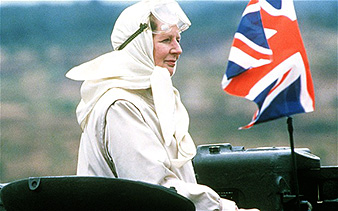
Team Yankee is also getting updates with two new new nationalities being added to the fray. The not so subtle hints include pictures and a video of the BO 105 helicopter, which was developed in Germany and used by the Bundeswehr (among other operators). The other photos show British Prime Minister Margaret Thatcher riding in the commander's hatch of what I believe is a British Challenger tank. It also appears that some Digital exclusive lists will be showing up for Team Yankee as well, though the business model for getting the unit cards to the players is still being finalized.


Speaking of Digital - it's coming for Android! The current ECD is around the end of March, but apparently Battlefront doesn't have complete control of the project, so there could be some softness in that date.

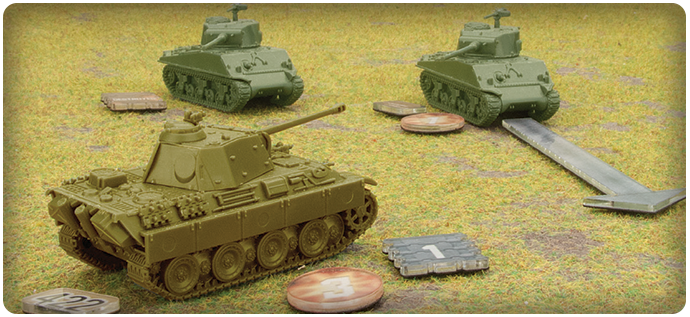
The new Tanks skirmish game is also shown in some more detail. It appears as if the plastic tanks for the game are the same as the plastic models we've come to enjoy for Flames of War, but they are molded in color (the German Panther is in panzer yellow while the American Shermans are in a green drab). Tanks will use unit cards like we've seen in Team Yankee and were seen previously in Dust. I don't know if I'm totally sold on Unit Cards yet, but I can see the utility of them, especially in a skirmish game. We'll also get British and Soviets as well, again based on the current plastic range.


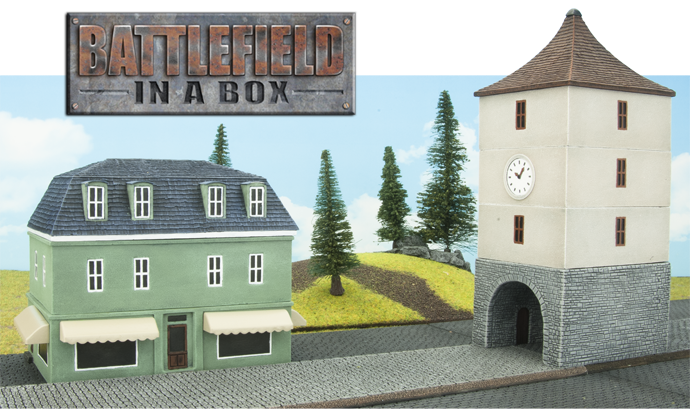
Finally, a couple of really nice looking Battlefield in a Box buildings are shown - again, these look great (see below), and honestly I love pre-painted terrain, as that is one more thing I DON'T have to paint. I barely have enough time to paint my armies - I definitely don't have time to paint a bunch of terrain as well.


It also looks like Battlefront has outgrown its space in Malaysia and will be moving to new digs. This move may throw a wrench in production schedules depending on how they have it set up, and I don't envy them the task. Moving is always a pain!

As it stands, 2016 looks like it will be another exciting year to be a Flames of War player. I was hoping we'd get a bit more granularity for later in the year as most of this update appears to be front-end loaded, so I suspect that Battlefront has at least one more rabbit to pull out of their hat.


Tuesday, December 22, 2015

Team Yankee Miniature Review - Abrams and T72

Unless you've been under a rock, you're aware of the massive launch of the new Flames of War variant released by Battlefront, Team Yankee. I'd proofread the original rules coming through, so I knew this was going to be at the same time a familiar, but in many ways totally different game. The original Flames of War rules work well for World War II, and honestly any conflict prior to the addition of the massive high-tech you start seeing in the 1970's and 1980's. Speculation on the various forums was rampant, but I'd always felt you'd need a modified version of the FoW rules to make "modern" work properly, and that's what Battlefront has given us.

To get the ball rolling, they've started releasing the miniatures to support this new game system. Right now all we have is Soviet and American, but there are some nice army deals to help the new player get his or her feet wet. The American set is called Bannon's Boys (TUSAB1), named after the character Captain Sean Bannon in the original Team Yankee novel, which consists of five M1 Abrams tanks, two AH-1 Cobra helicopters, and an objective marker (in addition to commanders, decals, a template, and unit cards). The Soviet set is called Potecknov's Bears (TSUAB1) - (don't fat finger those SKU's!) - which consists of nine T-72 tanks and two Mil-24 Hind helicopters (in addition to commanders, decals, a template, and unit cards). Because of a production delay, people who'd ordered early got an extra M1 in the American set or an extra T-72 in the Soviet set. In this first blog I'm going to look at the tanks, and so far overall I really like what I see.

The M1 Abrams was the first completely new tank fielded by the U.S. Army since the introduction of the Pershing in 1945. Overall the Battlefront Miniature looks pretty good, and they've made some smart, and a few confusing, design decisions. First the good news, the sprues as produced will allow you to construct either an M1 or M1A1 Abrams tank. The Team Yankee universe assumes that World War III starts in 1985, given the M1A1 didn't start production until 1986, the fact that you can currently build both variants bodes well for future plans with the rule set!

The Abrams comes on two sprues - one with the major hull and turret components, the other with the running gear and most of the detail parts. One very clever thing Battlefront did was to leave a large slot for the blast panels over the ammunition stowage on the turret roof. The detail parts sprue includes a reversible piece which will allow you to replicate the M1 style (three spaced panels) or the M1A1 style (two panels) turret roof.


The detail on the wheels and tracks is very good (and yes, the drive sprocket has the right number of teeth!), As you can build the M1 or M1A1 variants, one version of the rear side skirt armor includes the large 25 inch retainer plate seen on the M1 version, but which was dropped on the M1A1. The purpose of the plate was to reduce the frequency of thrown tracks, but in practice the system didn't work. In fact, the original side skirt armor (reproduced in the kit) actually allowed mud to build up clogging the drive train. Therefore the troops quickly field modified the side skirt (or removed it all together!), into the later version of skirt - but generally kept the retainer plate installed. By 1985, the time frame in which Team Yankee is set, tanks in the field would have had a the modified rear armor skirt and retainer plate - a version you can't build with the parts available in the kit since the retaining plate is molded to the initial version side skirt. I haven't decided whether I'm just going to go with the early style "as is" (as I have photographic evidence of unmodified side skirts as late as 1983) or do something crazy yet... watch this space...


In many ways the T-72 is a lot simpler as there only one variant, and all you have to decide is whether or not you want the hatch open for a commander and whether or not you want a mine clearing device. There are a few tricky bits in construction, however. The massive 125mm smoothbore gun has three sprue attachment points which are somewhat difficult to remove without damaging the fins which run the length of the barrel in several segments. The auxiliary fuel tanks are also a bit troublesome as they have a large seam where the two halves join. The 1/35th scale modeler in me still twitches a bit, so I'm trying to remove them at least on the most visible edge. I also had to redo the ends as the seam was too pronounced to clear easily - I just sanded them flat and re-added the disc in the center.


The kits include the new "pins" to attach the turrets, but I'm still generally using rare earth magnets on all of my tanks - makes painting and detailing easier. From the photo below you can see the size (and sleekness) of the T-72 compared to an in-progress Panzer IV Ausf H and a T-35 tank.


Overall the T-72 has gone together well, but once you start getting a few of them together, you quickly realize that modern MBTs are gernally larger than their historical cousins and will look different on the tabletop. It will be interesting to see where Battlefront takes the game (and the T-72) from this point, as starting in 1985 reactive armor was standard for the T-72.

Thus far I'm very impressed with the plastic tank miniatures Battlefront has produced for Team Yankee. Overall they are well-engineered and fit well. Battlefront has also made some very clever decisions early on to ensure that the kits are modular for more than one era. Next I'll start going through the helicopters - I've been working on one of the Hinds so far. By way of a preview - it's big, but it's also a fairly demanding kit.

Sunday, November 22, 2015

Panzer IV/70 (A) Track Update

A few months back, I wrote a blog entry about the Panzer IV/70 (A) and my desire to actually do the generally very nice Battlefront miniature (GE110) justice. My major complaint at the time was the lack of a four steel-wheeled version of the tracks. At the time I was working to find a way to create a good set of tracks for the miniature, and now that my Soviet Lend Lease army is largely done, I've finally made some progress.

The first challenge was to create a steel-rimmed roadwheel that matched the scale of the rubber-tired wheels on the plastic Panzer IV Ausf H set (GBX79). I ended up finding some styrene tubing that was the right diameter, though it was too thick for the steel rim of the roadwheel. I thinned it down quite a bit, but left a little thickness there so you could actually see the detail once it's done (as the "real thing" is fairly tiny). I then added the center detail and hub and cast up several (shown below).


I ended up casting the wheels as a fairly long tube and then sanding them back to the required thickness rather than trying to cast a very thin wheel on its own. This let me custom fit the roadwheels to the tracks. Using my Dremel tool, I carefully removed the first four roadwheels of both sets of tracks, and then added in the steel wheels as replacements. 


Above you can see the process half way through - the top track run is ready for casting, while the bottom track run has had the first four roadwheels removed and ready for replacement.  

At this point I have finished both sets of tracks and the RTV is currently halfway through its 24-hour curing cycle - so by tomorrow night I may be able to start casting new tracks. I decided not to cast the fenders with the tracks, and instead I'm going to borrow the plastic fenders from the Battlefront Panzer IV Ausf J (GBX68) and use the metal ones from the Panzer IV/70 (A) (with the correct idler) for the Panzer IV's (as the Ausf J only began to use three return rollers starting in December 1944). I'll continue to post updates going forward as the project progresses!

Thursday, November 19, 2015

Soviet Lend Lease Tanks - Done Enough!

I had been planning on doing a full build log as I worked on my Inomarochnikiy Tankovy Batalon, but I was so pressed for time during the painting process, that I didn't really get a chance to take "in progress" pictures, much less actually include them on the blog. I also didn't get a chance to do my normal write-up of the army for the tournament, but I did finish - well, finish enough - to take the army to the tournament and play. Granted, I was cleaning the airbrush at 12:30 AM Saturday morning, but I just made it in under the wire. I've finally managed to take a few photos of the army - they're not ideal, but they'll give you an idea how the army came out.

First up is a unit of Valentines. I based my army on units fielded by the 2nd Guards Tank Army, mostly during the Berlin offensive. I haven't been able to verify whether or not the 2nd Guards still had Valentines that late, but I know other units were still fielding late ones. I also found an insignia used by the 2nd Guards on their Valentines - so I went with that and created my own decals. The paint is a modulated version of the Ammo of MIG 1944 British Olive drab - I mixed my own modulation colors


The Katyusha is one of the quintessential Soviet weapons - used in Berlin and earlier. These are run pretty much out of the box using AK Interactive Soviet 4BO green modulation colors. The figures and rockets are painted with various Vallejo colors. 


Since I couldn't bring the ISU-122 unit that was thought to be used by the unit, I went ahead and went with their little brother, the SU-122. These are some newer blisters, and have the new plastic tracks rather than the holder metal ones. I also created some empty fuel cell racks for a few of the vehicles. The decals are stock (though I can't remember which set I got these from). These were also painted with the AK 4BO modulation set. The tracks are Ammo of MIG Shadow rust with a Vallejo oily steel drybrush.


I apologize for the blurriness of the photos, but below is the SU-76M unit. These were a lot of fun to paint up. I painted the guns and crews separately modulating the various pieces. Again, these were done with the AK interactive set. Decals are from I-94 Enterprises - they make very nice stuff!


For big battles, recon is absolutely vital - so I included a small unit of BA-64 in the army. These things were very quick and easy builds, although painting the gunner in the turret is a bit of a challenge as they're not as crisply molded as some of the other crew figures, but they came out well with a little work. Once again, these were painted with the AK 4BO modulation set.


Now on to the core of the army - the Shermans. Again, the photos aren't great, but you can get the idea. The decals are hand made and representative of 75mm and 76mm Shermans from the 1st Mechanised Corps, 2nd Guards Tank Army. First up are the 75mm M4A2s - these are a mixture of early M4A2 miniatures as detailed in a previous blog. I cast the miniatures with the applique armor, but unfortunately the mold disintegrated after about the 7th cast (which seems to be fairly standard for my molds these days), and I didn't have time to make another mold. Given I have photos of the early M4A2 75mm in Vienna in April 1945, I figured it was okay to include them. The vehicles are painted with the Ammo of MIG Wargame U.S. Armor Set which includes modulation colors.


Finally the 76mm Shermans - these are all various Battlefront models, but I've added the plastic 76mm guns with the muzzle brake since these were seen in Berlin. The decals are hand made again to match the 1st Mechanized Brigade.


Overall I'm pretty happy with how the miniatures came out. This was definitely a marathon, not a sprint, simply because of the raw number of vehicles involved in getting the army together. I'd intended to add some stowage to all of the tanks, especially un-ditching logs as they were very characteristic of the vehicles fighting in Berlin. Unfortunately I just ran out of time. I did get enough done to tie for "best painted" at the tournament. I'm planning on going back and adding some stowage before moving on to the next project.

Sunday, November 1, 2015

On to Berlin! A Late War Soviet Lend Lease Tank Army in Progress

So I finally made up my mind on what to bring to the upcoming "1945" tournament at Guardian Games. I've wanted to do a late war / Berlin Soviet Sherman Army for several years at this point - and I finally decided to just go for it. Armed with my Ammo of MIG (and a few leftover AK Interactive) paints, I've been madly working on the army.

The fun thing about the Inomarochnikiy Tankovy Batalon (Red Bear Revised, page 138) is that you can run both 76mm and 75mm equipped Sherman tanks in the same company in large quantities. Unfortunately there is no Berlin timeframe list at this point, as the Desperate Measures update that includes options from Berlin only covers the T-34 armed Tankovy Batalon. There is a "Hero" list on Digital, but I really wanted the massed armor rather than the smaller units of the Hero list.

I decided to mark my Shermans as belonging to the 1st Mechanised Corps, 2nd Guards Tank Army, 1st Byelorussian Front during the assault on Berlin. True confession time, I don't know if the 1st Mechanised Corps actually had both 76mm and 75mm Shermans available. I know they had earlier fielded the M4A2 (dry) with applique armor, and those vehicles lacked the distinctive "L" shaped markings on the hull sides. I also know that Soviet forces in Vienna, Austria not only fielded both types, but even had some early M4A2 still in evidence. So I figure it's within the realm of possibility given Soviet AFVs fielded at the time to include a mix of models, but I don't have any definitive photographic evidence.

There are no decals available for the 1st Mechanised Corps, so I had to create my own as I have done previously for the Tiger I tanks from my 502 Schwere Panzer-Abteilung. Unfortunately the decal maker gave me a heck of a time today, but I finally have all but three of the tanks ready to go (at least the Shermans). I also made up some decals for some Valentine tanks used by 2nd Guards as well. Again, I'm not sure many Valentines actually made it to Berlin, but I know they were around at the Battle of Küstrin. I also have some documentation for 2nd Guards markings for Valentines.

The Shermans are basecoated at this point with modulation colors from the Ammo of MIG Wargame US Armor Set - I'm now in the process of finishing the decals so I start the washes and weathering. Here are a few of the 76mm armed M4A2 - notice they all have the muzzle brake:


I also have several 75mm M4A2 in progress as well (a mix of large hatch and small hatch dry stowage models):


This is what you call a mess of Sherman tracks - fortunately the Soviets tended to use metal tracks, so the painting will be easier.


I've been able to generate some reasonably nice markings with my decal making system, but it's a bit of an involved process - with at least nine opportunities to completely screw-up. Unfortunately I took advantage of many of those opportunities to screw-up this weekend, but I finally obtained decent markings for all but three of the tanks (I'm going to have to re-do some markings later this week). This is one of the white foils that lets you turn a "black" printed image into a "white" decal:


I'd hoped to add both SU-76M and ISU-122 to the force as I have sources that suggest both were fielded by the unit. Unfortunately the new plastic Heavy Assault Gun Company (SBX37) just arrived at my house this weekend, and given the tournament is in two weeks, and I'm way far behind as is - so these beauties will have to wait for next time. I've gone ahead and added the SU-76M - and thrown in some SU-122 instead of their larger, more heavily armed and armored cousins. I believe most of the SU-122 were removed from service by this point, but it fit into my allowable points and is a good anti-infantry platform. I've used an AK Interactive Russian Green Modulation Set for these:


The Valentines were a bit tricky - I decided to use the late war British 1944-1945 Olive Drab from Ammo of MIG - found in their British 1939-1945 European Colors set, but I had to mix my own modulation colors. I think I could have used more contrast, but they came out pretty good none the less (and to the top you can see the modulated BA-64 armored cars as well - dang those are tiny!):


So, as per normal, I have a lot to do to get all of these done for the tournament, but I'm hoping now that the decal system is working again, I'll be able to get everything taken care of in a reasonable amount of time... yeah, I know, I'll be madly finishing up on the Friday night before the tournament as per normal. I'll try to post a few more pictures as I go along, but if all else fails, I'll do an "after action report" with all of the details on the completed miniatures.

Sunday, October 18, 2015

Pimp My Emcha - Kitbashing the M4A2 Sherman in Soviet Service

The M4A2 was the most common diesel-powered version of the ubiquitous Sherman tank. Powered by the GM 6046 engine, it gave the M4A2 a very strong power to weight ratio, though the engine experienced some initial reliability issues.  Over the course of the war, nearly 11,000 M4A2 variants were produced with roughly 8000 of those being armed with the 75mm gun (April 1942 to May 1944 production), and the remaining 3000 armed with the 76mm gun (May 1944 through May 1945 production).

While the U.S. Army decided to limit overseas deployment to gasoline powered models of the Sherman, the diesel M4A2 was still utilized in large numbers by other operators. The U.S. Marine Corps used the M4A2 during the Pacific campaign, but eventually began to transition to the M4A3 variants. The Soviet Union was ultimately largest combat user of the M4A2. During the course of the war the Soviets received roughly 4100 vehicles (50% 75mm / 50% 76mm) through Lend Lease.

As with the other Sherman models, the M4A2 underwent a variety of changes during its production run. At this point Battlefront only makes two M4A2 variants which don't fully represent the variety fielded by the Soviets during World War II. However, with a little work you can get every variant used in the European war using the two M4A2 miniatures and the new plastic M4A3 (UBX44) box. There were HVSS versions of the M4A2 provided to the Soviet Union, but these were only used in the Manchurian campaign.

The basic M4A2 Sherman (SU071) provided by Battlefront is one of the earlier small hatch variants. Production of this version began in roughly April 1943 when the direct vision slits were eliminated and replaced with periscopes. Ammunition stowage was still dry. The 75mm turret is also one of the earlier types with a pistol port, but no loader's hatch (D50878). While most of these vehicles were produced in early to mid 1943, there is at least one picture of such a vehicle in 1945 in Vienna, Austria. The drive sprocket is the earlier "open" style and comes from the original plastic Sherman track set.


The 76mm M4A2 Sherman (SU073) miniature combines the M4A2 large hatch hull with wet ammunition stowage (i.e. "protected ammo"). The turrent is an "oval hatch" variant of the 76mm Sherman turret, which appears to have been common to most of the M4A2 provided to the USSR. Versions both with and without a muzzle brake were provided to the Soviet Union, but the miniature only provides the sans muzzle brake variant. By 1945 there seemed to have been a large number fielded with the muzzle brake, especially for the final push into Germany itself. I've therefore updated the original Battlefront miniature with the M4A3 plastic gun with muzzle brake.  I've also added the plastic tracks as they have a good steel track pattern on them and the "economy" drive sprocket. These vehicles were all produced in 1944 and deliveries to the Soviets began in the fourth quarter of that year.


There is, however, a large production gap between the early style miniature (SU071) and the 76mm version (SU073). During that time the M4A2 transitioned to a large hatch variant with the 75mm gun. As at least one army I'd like to field some day uses that variant, I had to create it myself. The large hatch M4A2 was first introduced with dry ammunition stowage. To protect the vulnerable stowage bins, applique armor was applied in three locations to the outside of the tank (it's debatable as to whether or not this would count as "protected ammo"). To produce this version, I took one of the 76mm hulls, added the additional armor plates, and began casting copies of it.


I borrowed the 75mm turrets from the M4A3 plastic box as they have the right combination of commander's hatch and loader's hatch to represent this variant of the M4A2. The tracks include the correct "economy" drive sprocket and are available through Battlefront special order as USO183. As the texture of the plastic is very smooth, I used some plastic cement and a stipple brush to provide some cast texture to the sides of the turret.


While I can quibble with some of the details of the plastic M4A3 boxed set - overall I must say that Battlefront has engineered a solid and easy to construct miniature. Another plus is the pieces are generally compatible with the existing inventory of resin and metal miniatures making it easy to swap parts between the two. By way of comparison I've recently picked up a Zvezda 1/100th M4A2 late (with muzzle brake). Zvezda's kit is cheaper per vehicle, and in many ways it is more accurately detailed. However, the construction of the Zvezda kit is much more reminiscent of a larger scale model kit than a miniature with fine details that only experienced modelers will be able to take advantage of in 15mm scale. The way the pieces are broken up will also result in some very odd gaps or seams in the final figure.

In game terms, the large hatch 75mm M4A2 should probably have the Front Armor 7 of the later 76mm version, though with the applique armor, I doubt it would count as "protected ammo" in game terms - that distinction seems to come with the "wet" ammunition stowage which was introduced later. I'm simply going to run them as standard 75mm M4A2 tanks. Personally I'd like to see the option at some point for the Soviet Sherman lists, but that would require a lot more granularity than we've gotten at this point for the Inomarochnikiy Tankovy Batalon (Lend-Lease Tank Battalion).

Overall I'm happy with how I was able to take the existing Battlefront parts and generate any version of the M4A2 I needed with very little casting required.  Now I have to decide whether I'm going with an army like this for an upcoming tournament or something that has fewer moving parts.

Thursday, October 1, 2015

Upcoming "1945" Tournament!

In honor of Battlefront releasing "Berlin" - which at least chronologically wraps up the war in Europe, there will be a "1945" tournament at Guardian Games on November 14, 2015. Lists must come from a handbook or online / digital list that includes the year 1945 - so there won't be any Normandy or Market Garden lists included in this particular tournament. The point value is also higher than I've generally done - 1945 points in honor of the year.

The thing is, I'm in a quandary about what to bring for this particular tournament. To be completely honest, I've been extremely busy with writing this summer - along with other non-Flames of War hobbies and responsibilities (yes - I do have some!), and my Polish Black Brigade is still begging to be finished up (it's getting there, but not THERE yet dang it). That means space and time have been at a premium, but I've had a few projects on the back burner that I've slowly been working through.

By and large I've been an Axis player - the more unusual the army the better. One of the forces I've been looking at is 26. Panzerdivision from Fortress Italy. I have some good research data on the unit including some wonderful markings for the unit's Panthers, Panzer IV's, and Stug IV's (yes - IV!) from the Firefly collection book, To the Last Bullet: Germany's War on Three Fronts, Part 2: Italy. The unit has some nice modified Panthers, but for its capability, the Panther is very expensive and fragile in very "Late War" games. Even with a lot of Panzer IV/Stug IV support, it is going to be a tough army to attack with successfully - especially at high point values.  Generally at high point values the Reluctant Trained Panthers seem to do better on sheer volume, though you'll not likely get a lot of 6-1's.

Given I wrote the German section of the Bridge at Remagen book, there are still several armies in that work I'd like to field. The Jagdtigers of 512. Schwere Panzerjäger Abteilung have always been a favorite of mine, and at 1945 points, I think both the CV and RT versions would both be viable, though the RT would I think work a little bit better because you'd have more big guns and the option of Carius. 654. Schwere Panzerjäger Abteilung would also be interesting, and I've already started working up some of their Jagdpanthers, but unfortunately they have the same issue Panthers have - they're fairly fragile for the points cost. SS-Panzer Brigade ‘Westfalen’ would also be interesting, and is a really decent defensive army with some strong armored support, but I'd have to paint up a bunch of SS figures (and the LW Battlefront minis often have issues) - and just about anything out of Remagen is going to need Volkssturm support - which is a large time sink for figure painting.

Given the large point-value of the games, I've also considered a couple of the Berlin lists (again, as I did a fair bit of research and writing for that book as well). The Berlin Kampfgruppe gives you so many options, you can tailor build a force to your liking. I was thinking of running a fortified company with a mix of Heer, Volkssturm, and Hitlerjugend with Panther Turret bunkers. I've even considered throwing in either Elefants from 614. Schwere Panzerjägerkompanie or the Krupp-Steyr Waffenträger as well. Depending on the mix of missions, fortified companies can do well, or fail miserably at a tournament like this - especially at these point values. However, while I really want to do this army some day for purely historical reasons, it would involve a lot of infantry painting as opposed to vehicle painting, and I'm a much more efficient (and better) vehicle painter than infantry / gun crew painter. I'm looking at least a couple of Volkssturm units, Hiterjugend, at least a platoon or two of Heer, machine guns, anti-aircraft guns (those 3.7cm Flakzwilling are too good to pass up) - and I just don't think I have the time to do the force justice.

Another list I've considered is the Panzerdivision Müncheberg list on Flames of War digital. I helped sort out the force organization for this one, but as with the 26. Panzerdivision list above, the core of the unit is fairly expensive - Panthers and Tigers - and given the proliferation of high AT Allied weapons, they're now fairly fragile. I know I could work up a very historical force, but I think the core of it (4 Panthers and 3 Tigers) could easily be wiped out in a turn facing something like British Comets.

Then there's Allied forces. I've always wanted to do a force representing the all African-American 761st Tank Battalion, but the current lists always seem to fall a little short of representing the unique character of this unit. One of the 1945 confident veteran or confident trained lists would likely work okay, but going trained would lend itself to putting together an "Arty Party" which is unbalanced. It would run well in the tournament, but would lack the feel of the unit in my view.

There's another good Firefly Collection book, Comrade Emcha: Red Army Shermans of WW2, that has a lot of great photographs and color plates, including some good force organizations to build a great Berlin Soviet lend-lease tank unit from Red Bear. I've also recently picked up Dmitriy Loza's autobiography, which is another great source of inspiration for this army. I could theoretically run a mixture of 76mm and 75mm M4A2 Shermans in this list - though I'd need to update a lot of the 75mm M4A2's to the "large hatch" versions as most of the "small hatch" versions had been destroyed at this point (though there is photographic evidence of a few surviving). I know Valentines were being used during the assault on Küstrin, so I could throw them in as well. Throw in Loza and Nevsky and you've got a force with a lot of alpha punch... but on the downside it is a lot of painting to punch it out to 1945 points.

So as I said... I'm in a quandary. There's reasons for and against running each list. Historically they all have something very solid to offer. Each unit tells its own important story about the state of the war and that particular group's role in it. In terms of game mechanics, I think any list where the German tanks remain fairly safe from the front when faced with Allied AT assets is going to have an advantage over those that don't - but my RT King Tiger list from last year was still delicate to play. I think I'm more likely to win games with the Allied lists at this point, but my primary goal has never been to max/min the heck out of a list for a Flames of War tournament.

If you have any thoughts or suggestions, feel free to put them in the comments below!

Monday, August 31, 2015

Battlefront's Panzerkampfwagen IV Ausf H - and a New Army

I've got a late-war tournament coming up in roughly November, and the theme is "1945" - and the tournament will be 1945 points. I avoided the temptation of going with a fortified list from Berlin, because I thought it would be a bit beardy, so after wracking my brain for a list I wanted to do (which sadly doesn't include the lovely Panzer IV/70 (A) unit I've been working on in the background - as they're Autumn 1944... sort of the whole theme of that one...) I finally settled on something. More on that later, but the new list does give me a chance to use several Panzerkampfwagen IV Ausf H, alongside a few Panthers, and even some Stug IV's - yes, you read that right IV - not your garden variety III - in a tank list. Once again I'll likely die horribly, but will hopefully look good while doing it.

With a mini-host of Panzer IV Ausf H needed for the new army, and given the fact that I had a spare lying around from my aforementioned Panzer IV/70 (A) project, I decided to go ahead and build up one of the all plastic tanks from the Panzer IV H Platoon (GBX79). The original release of this miniature was a bit of a fiasco. Not only did it retain the mistake on the idler from the Ausf J plastic parts sprue, detailed in my earlier blog, but it had the wrong number of Schürtzen plates as well. As an interim measure Battlefront provided free copies of the old Panzer IV H Schürtzen (GSO186), but they ultimately had to go back and rework the tooling for this one as the errors were so bad. Fortunately they also cleaned up the idler in the process (now if they’d just go back and fix the Ausf J as well).


Above is a sprue from the original run - you can see the issues with the Schürtzen and idler. A painted copy is below, which shows how far the error went before it was caught when it was released into the wild.


Fortunately Battlefront improved the kit... drastically. It now has the correct number of Schürtzen and the idler is correct as well. The only nit I can pick with the suspension is that all of the wheels are oriented the same way, not as big on the Panzer IV, but they do the same thing on the Stug III, and it looks a bit odd as you never see a real vehicle with it's wheels lined up perfectly.  


As pretty much every Panzer IV Ausf H had zimmerit, the plastic version has it molded in. The only drawback here is that the zimmerit looks a bit heavy and blocky to my taste. Compare the plastic version:


To the earlier resin version (GE046):


The zimmerit is much finer on the resin version. That being said, there are a lot of drawbacks to the old resin version. Installing the Schürtzen was always a royal pain in the butt. The turret Schürtzen were molded to the turret, generally with very thick hunks of resin along the bottom of the turret (I generally drilled mine out - which was also a pain in the butt). The tracks aren't nearly as nice either, though the road-wheels are molded as single cylinders rather than two wheels in parallel (if you put the Schürtzen on, you'll never see that part, though). The hull machine gun is a bit better on the old resin version, but the new one isn't bad.

All that being said, the new kit has two big advantages: 1) it's plastic and 2) the FIT. I'll start with the second one first. I continue to be impressed with the fit of the new Battlefront plastics. The Panzer IV breaks down logically into sub-assemblies, and the fit is outstanding across the board. Very little filling and puttying is needed (and that's only if you suffer from AMS - Advanced Modeler's Syndrome). The turret bottom plate can use some putty up front, and the two halves of the gun recuperator have a bit of a seam. Rare earth magnets fit easily in the top hull and the turret bottom to create a very good join between the two.

The second advantage is it is plastic. Conversions and modifications that are extremely challenging in resin and white metal see their degree of difficulty drop considerably in plastic. I'm honestly not making major changes to my Panzer IV's (other than adding some stowage and what not). The only thing I'm doing is toning down the zimmerit a bit - which is child's play - because it's PLASTIC. All it takes is a liberal dousing in liquid plastic cement (as it is a solvent - not a "glue") and it will soften those hard edges quickly.

Looking at the miniature in the previews and on the web, I was far less impressed with it than I have been in person. Softening the rough edges of the zimmerit was exceptionally easy, and the whole thing went together very quickly. Having just built up several StuG IV miniatures, I can also say I appreciated the fact that the barrel was molded with an open muzzle brake, so I don't have to drill that out myself. I'm honestly looking forward to getting more of them to finish the set, though I'm having to be careful to make sure I get the right ones - the pre-fix copies are less than useless to me.

Sunday, August 16, 2015

Krupp-Steyr Waffenträger from Heer 46

With the release of the Berlin supplement for Flames of War, there are a few of the more unusual self-propelled anti-tank vehicles available to take in your Berlin Kampfgruppe. Battlefront included the 8.8cm PaK43 auf Waffenträger as an option in the Tank-hunter Platoon on page 25. However, the Germans ended up producing several different Waffenträger on the venerable Panzer 38(t) chassis, and at this point Battlefront only produces one variant. Their version appears to be the Ardelt prototype, and is available in a full unit of three as the Waffenträger Tank-hunter Platoon (GBX88). These are neat vehicles, but I’ve always liked the look of the Krupp-Steyr version a bit better, known as the leichte Einheitswaffenträger fur 8.8cm PaK 43/3.

The Ardelt prototype simply mounted the PaK43 in a pretty much unaltered form on the back of the vehicle (shown below). This effectively created a fully mobile PaK 43 anti-tank gun, though aiming the gun through a larger arc could be problematic as the vehicle itself was somewhat narrow. This results in the vehicle having the “Awkward layout” special rule in the game.  


The Krupp version looks a bit more elegant with the large PaK 34 being housed in a small turret on the rear of the vehicle. The vehicle itself is a bit lower to the ground, and the turret in the rear is very tiny, so in game terms it would retain the "Awkward layout" rule.


While Battlefront doesn't make a miniature of this version of the Waffenträger, Heer 46 does, though he tends to sell out of his more popular miniatures frequently - it may take several visits or an email to get one in stock. Heer 46 specializes in hypothetical and prototype armor from late World War II with a focus on German subjects. Many of his products begin with 3D-printed masters, which on many subjects leads to a certain level of simplification. However, the detailing on the Krupp Waffenträger is quite good overall. It helps that the vehicle itself is slab sided with only a few details.


Overall the casting on the hull is quite good, especially for a cottage industry product, but it isn't without its problems. The mounting hole for the turret is too shallow and had to be drilled out. With the weight of the white metal main armament added, a rare earth magnet is NOT optional, and since the size of the hole is smaller than the standard Battlefront version, I'm going to need to pick up some smaller magnets.


The only glaring problem with the miniature is in the deck and rear hull casting. It is clear that the sprue attaches through the back hull, and the clean-up job (remember - likely done by hand!) isn't perfect. The deck itself has shrunk away from the mold creating a concave rather than flat profile for the upper hull. Given the rest of the detailing is so good, I'm not going to bother with correcting it. There are also some resin bubbles typically found around the rear axle, but an engraving tool makes short work of those.


The kit includes canvas covers for the turret, but I'm going to model all three of mine with the turret open. The turret sides are thick molded (the sides drop vertically from the top rather than following the angle of the plate), but throw in a couple of crewmen and you'll never notice!


What really sold me on this model was the running gear, which is absolutely beautiful! The front fenders are VERY thin and the detail on the roadwheels and sprockets is amazing for this scale. They'll paint up very nicely. 

The gun is white metal, and two out of the three I received were nearly flawless. The third had only a bit of mold slippage. Bear in mind you may have to do a fair amount of straightening as Heer 46 uses minimal packaging and mine took a little bit of a beating coming over from Europe! I'm going to add a couple of figures from the Vehicle Artillery Crew (GSO114) and a few left over from other vehicles as the miniatures themselves came with no crew. Given the stats should be exactly the same, I plan on using these little beasts as the Waffenträger in one of my Flames of War armies using the Berlin book or the digital lists. 

If you're ambitious, there are several more variants of the Waffenträger out there. In an earlier blog, I mentioned the Ammo of Mig 1945 weathering magazine covering "1945." The issue also includes an exceptionally well executed Waffenträger by Sergiucz Pęczek that is based on what appears to be fairly standard Panzer 38(t) running gear. His version is a Rheinmetall/Ardelt prototype combination which was produced in April, 1944.  

Friday, August 14, 2015

Building the Bergetiger (P)

First I want to apologize again for the lack of posts, I've been continuing to work on my Black Brigade - they're now in the basing stage. I've also been writing for a project that will be released later in the year - I can't go into details yet, but watch this space for more information in a few months. So without further ado - on to the post!

The Elefants and funnies of 653 Schwere Panzerjäger Abteilung remain a popular (and fun to model) army for Flames of War. Building some of the vehicles may seem daunting at first, but with a bit of patience most modelers can successfully perform the conversions. 

The key to any good conversion is starting with a good set of plans. Plans for the Bergetiger (P) are available in several reference books and online. The next step is to use imaging software to scale the drawings to match the miniature. In this case you’ll want to use the Tiger (P) (GE076) miniature. I typically use a set of digital or analog calipers to measure the key dimensions on the drawing which will give me a scaling factor in the imaging software. It is always best to use a longer measurement (like length) because the impact of measurement error will be minimized. When scaling, it is also best to scale all of the plans as one set of drawings rather than trying to scale them as individual drawings.

With your scaled plans in hand, you can now begin to actually convert the miniature. The Battlefront Tiger (P) miniature has the very early fenders which don’t extend beyond the vehicle sides for most of the length of the vehicle. To fix this, simply add some plastic card and sand it down to create an even fender profile along the whole length of the miniature.

Unless you want to scratch-build a lot of the details on the miniature, you’ll need to either borrow bits from other flames of war miniatures or cast portions of other miniatures to use as templates. For the Bergetiger (P) you’ll need the following details – From the Elefant (GE132) - Engine decks, top hatches, side vision port, front vision port.  From a Panzer IV Ausf G (GE044) – turret side hatches.  You’ll also need to borrow a Panzer IV hull machine gun and a Hetzer (GE101) top machine gun.


Step 1 is sadly removing most of the detail from the existing miniature as all of the Bergetiger (P) ended up with zimmerit, and the Tiger (P) miniature is clean sided.  I added zimmerit using green putty and a small flat-head screwdriver - well initially.  I actually ran into an issue during construction and had to redo the zimmerit and did it the second time with Apoxie Scuplt (which seems to work better for zimmerit) using the same small flat-head screwdriver to create the pattern. Unfortunately I didn't get photos of the Apoxie Sculpt version before painting.


I covered the whole deck in 0.05" thick styrene and then built up the rear superstructure based on the plans I'd already scaled to the correct size.  I modified a KV hatch (which was roughly the right size) to create the top hatch, but any appropriately sized circular hatch could be used.  I then went through and added the various resin details (tow hooks, engine screens, hatches, vision blocks) back to the miniature.


There are several small details (crane blocks, a small raised fence around the superstructure, etc.) that I added with styrene which can be seen on the rear half of the miniature.  I then moved on to final detailing  The hardest part of the conversion (and the hardest to keep intact on the table) is the crane itself.  I built it from a mix of brass rod, styrene rod, and wire.  Unfortunately it remains fragile.


At that point I simply added the final details like the Hetzer machine gun, and painted it alongside the other miniatures.  This particular miniature was painted before I started doing modulation, but it still holds up pretty well on the table.  I'd hoped that Battlefront would include the option for the Bergetiger (P) in the 653 Schwere Panzerjäger Abteilung list in Fortress Italy, but instead the included the Bergepanther.  That being said, I think it would be an allowable substitution which would more accurately reflect the unit on the table.

Saturday, May 30, 2015

The Panzer IV/70 (A) and a Bit of Nostalgia

I apologize in advance for the dearth of entries lately - other projects outside of the world of miniatures have been taking up a fair portion of my time, and my computer lost one of its hard drives (of course the one with all of my data on it!). I had a back-up but it was a month or two old, but regardless it could have been much worse. The moral of the story is "always back up your data!"

For this installment I wanted to talk about an upcoming army I'm working on for Flames of War, but I also wanted to wax a bit nostalgic as this army will feature a vehicle that I've loved for a long time, but have never gotten around to building in either 1/35th scale or in 15mm scale for Flames of War - the Panzer IV/70 (A). Decent 1/35th scale kits have been around for quite some time, and Battlefront released their version (GE110) of the vehicle a few years ago with the Stalin's Europe releases. Sadly I've been sitting on my examples since then largely because there are things with the miniature that just aren't quite right.

My attraction to the Panzer IV/70 (A) goes back many, many years - to the February 1990 issue of Finescale Modeler magazine to be exact. In 1990, I was a sophomore in college and armor modeling was still in its infancy or "Bronze Age" if you will. Taimya had started to release some decent kits, but many of their kits were still the 1970's vintage kits set up for motorization with numerous compromises in accuracy and detail. That issue included master model builder Dan Tisoncik's article "Building a Panzer IV/70 (A) in 1/35 Scale" which promised "This straightforward conversion could be your first taste of kitbashing."

For me this vehicle represents in a microcosm Germany's desperate war situation in the Autumn of 1944. It was an ungainly vehicle designed to get a more effective gun into the field in an armored chassis by any means necessary. The magazine article included templates and instructions to take two Tamiya kits to create the ungainly Alkett Panzerjäger. The article would later be reprinted (along with many others) in one volume Armor Conversion and Detailing Projects. While the instructions were clear and seemed straightforward, what really attracted me to the vehicle was Dan's paint job. The oxide primer camouflage truly underscores the expedient nature of the vehicle and brings the subject together. His execution of the camouflage over red oxide primer phase of German war production was nothing short of amazing for the time, and it still stands up very well today. You can see some of Dan's more recent work (which is nothing short of amazing... period!) at the Finescale Modeler site.


A bit more is known about this elusive vehicle today, and there are a few minor inaccuracies in Dan's conversion (especially around the steel road wheels). That being said, the Battlefront version has a few issues as well. You can either get it as originally packaged with all rubber wheels or with an alternate track for the Panzer IV/70 (V) (GBX67) which gives you two (but not four) steel road wheels.


The detail on the steel rimmed road wheels on the Panzer IV/70 (V) is poor, and the Panzer IV/70 (A) went from a full compliment of rubber road wheels to four steel wheels in September 1944 according to Panzer Tracts No.9-2 Jagdpanzer by Jentz and Doyle.  So clearly some sort of conversion is called for, but what to do?

I hit on the idea of running a unit from the October 1944 time frame.  This would allow me to use a variant of Dan Tisoncik's inspiring paint job on a full unit of Panzer IV/70 (A). I'll likely end up using the Feldherrnhalle Panzergrenadierkompanie list on page 140 of Grey Wolf. I'm not sure I'll actually represent Feldherrnhalle itself or another similar unit like 25. Panzer-Division which had formed a Kampfgruppe with several other units in the Warsaw area in October 1944. Obviously many of the core units would be similar, but for the 25. Panzer-Division version none of the Hungarian units would be attached.

Currently I believe my best alternative is to modify some of the newer plastic Panzer IV suspension pieces from Battlefront to create accurate running gear for the Panzer IV/70 (A). As the number of return rollers wasn't reduced to three until December 1944, the updated plastic Panzer IV Ausf H (GBX79) suspension seems to be a likely good starting point.  The idler has been updated with the correct number of spokes, it has the right number of return rollers, and the detail on the wheels and drive sprocket is quite outstanding.


Phase One will involve creating an accurate (as possible at this scale) steel road wheel. I'll then make several resin copies of it to attach to the suspension in place of the first four rubber wheels. Finally I'll cast up full suspension units for the Panzer IV/70 (A) miniatures.

I've already picked up a couple of the plastic Panzer IV Ausf H individually through special order, so now the hard part really begins. I'll continue to update you on my progress in future blog entries. In the comments feel free to highlight some of your favorite vehicles or sources of inspiration!