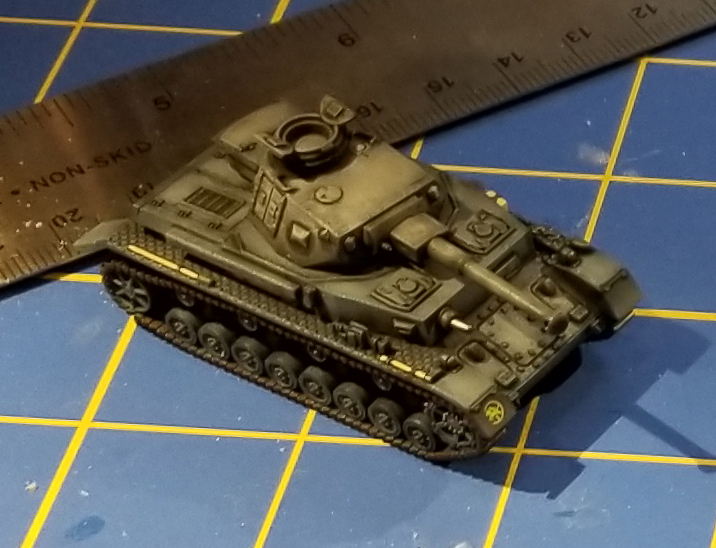
First off above is a small photo of one of the Panzer IV Ausf F2 tanks in the force. It has the full modulation coat applied and I'm now working on decals and detail painting. So far I'm loving how the panzer gray modulation coats are coming out and think the whole force is going to look really great on the table.

The next key feature I've been working on is the stowage box found on all of the unit's Panzer III tanks. I had to estimate the size of the box from photos as I don't have any hard and fast measurements of it. The box itself is built from a mix of strip and block styrene. I only made one box and then cast up several copies of it for the ten Panzer III tanks in the force (so far). At bottom below you can see the mold box that I poured the RTV into to make the mold.

Once I had several cast up and any bubbles in the resin dealt with, I installed them at the hull rear on the Panzer III tanks. You can also see some of the differences in the rear decks I mentioned in my last blog article. The plastic Battlefront Panzer III at top has the late-style deck, though both the late and early style decks share the large rear vent covers. The Battlefront resin version below has the more correct vent covers for the early-style rear deck. As you can see some details are a bit more crisp on the resin version while others are more crisp on the plastic version, so everyone's choice is going to come down to personal preference

The photo above shows some styrene side bracket connections for the stowage box. I based these again on photos of the real thing, and it seems that the boxes could slip in the field under hard use, so I didn't believe these had to be 100% perfect.

I've managed to get the first coat of paint on all of the Panzer III tanks at this point, with six of the ten appearing above. I've found that given their light weight, I need a "handle" of some sort when painting the plastic tanks, or the air pressure from the airbrush will simply push them along my painting surface in the spray booth. I can use them for the resin as well, but they're heavy enough to stay put.

I use a similar system for the turrets. I have a box of old screws and nails that can fit into some purpose built wooden stands (okay, so it's a piece of scrap wood with random holes drilled into it... it still counts as a "stand"). I've used this set up for several years to keep my fat fingers out of the wet paint, and so far it's worked pretty well. You can also see some Panzer II turrets as well as some 8.8cm guns. I haven't painted the 88's yet.
So progress is being slowly made. I'm hoping to have at least the vehicles done in another few weeks so I can start adding stowage. I also have a huge selection of infantry that's in progress, but that will bee the topic of another blog!
No comments:
Post a Comment